Lely developed new vehicle electronics for future generations robotic vehicles, for which new, custom Printed Circuit Boards (PCB) were developed. The goal of this sub project was to design a housing for ons of these PCB’s which will be able to withstand the rough life in a barn environment for a life span of at least 10 years.
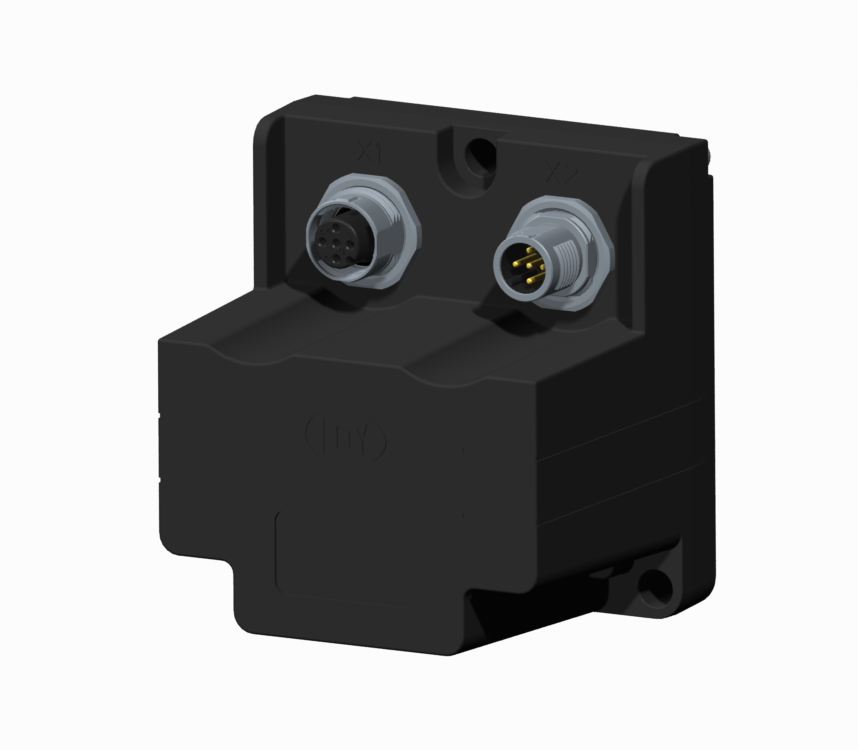
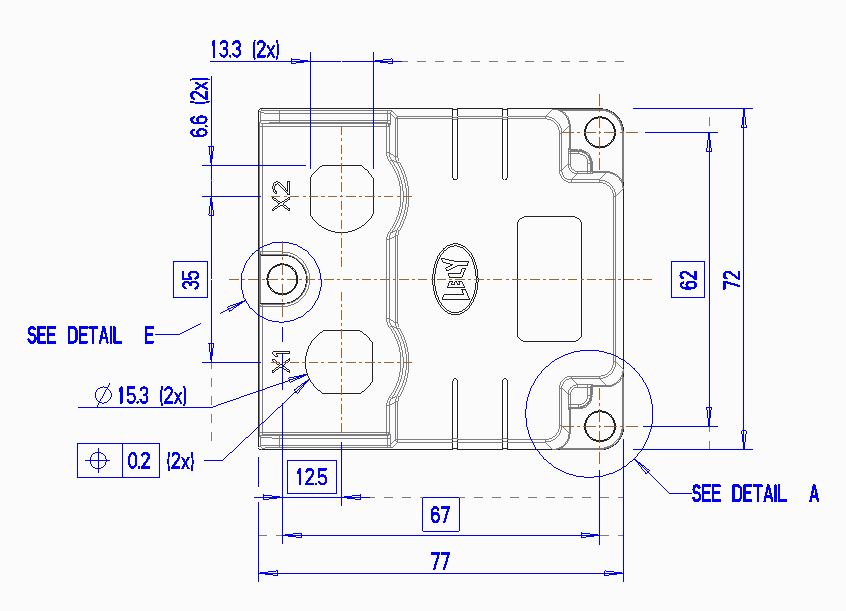
The main challenge was twofold: a design which is a compact as possible on one hand and protects the PCB from all the damaging effects of a barn environment on the other. This housing needed to be watertight, able to withstand the ammonia vapour, safe, be as cheap as possible and be in accordance with the Lely design rules. The housing was developed by me in close cooperation with the PCB-developer. This allowed us to optimize the size of the PCB and position of several critical components such as the connectors.
The material selection for the exterior was a difficult process in this case due to the strict requirements (ammonia resistant, big temperature range, IP94 V-0 flammability level, etc) According to the theoretical selection only very high grade polymers such as PPS and PEEK would be suitable. Due to the high material and production costs of these polymers, this was not an option. As a result, the problem was approached from a pragmatic point of view: plastic Lely products which came back after a life of 7 to 10 years of service in barn environments (Lely Taurus program) were examined for damage and polymer type. This revealed that a ABS-PC blend can withstand the chemicals and be V-0 without any problems, while being cheaper to buy and produce than the other options.

Besides the hard plastic parts of this housing, the seal between these two needed to be designed as well. Additionally, standard connectors did not fit all our requirements, so I also delivered feedback to the supplier of these connectors so a custom version could be developed and tested for this application.
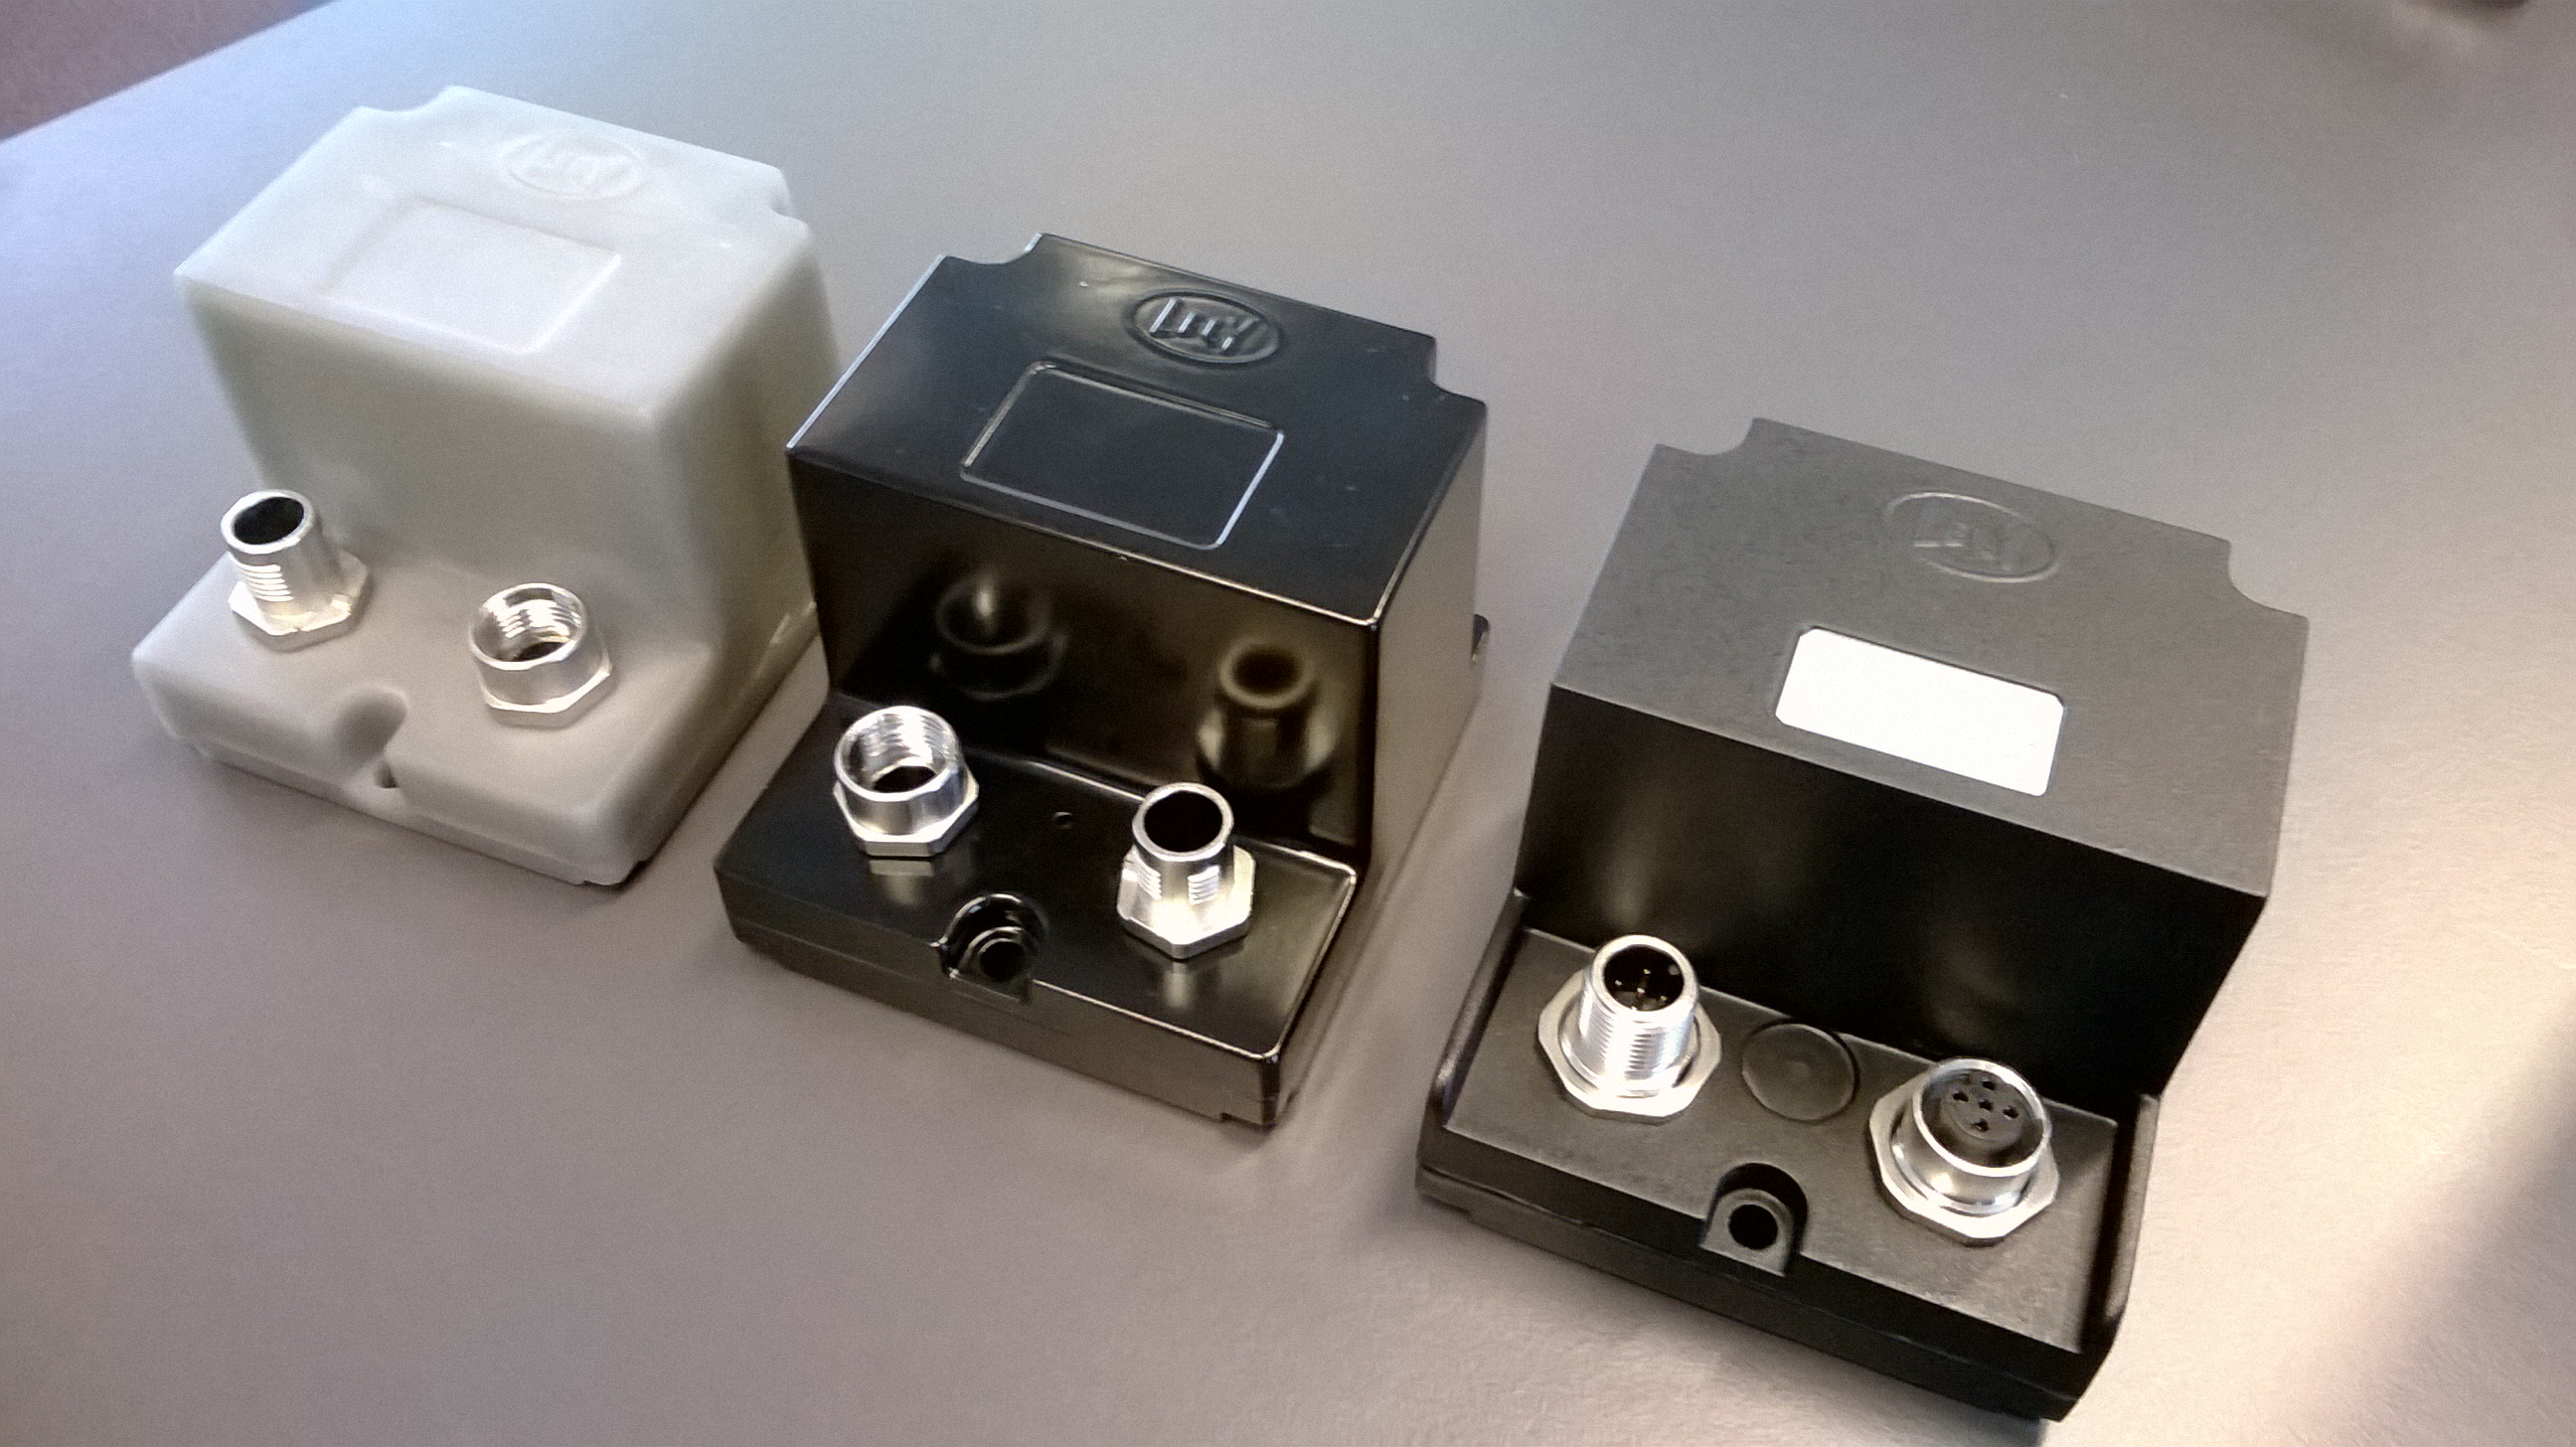
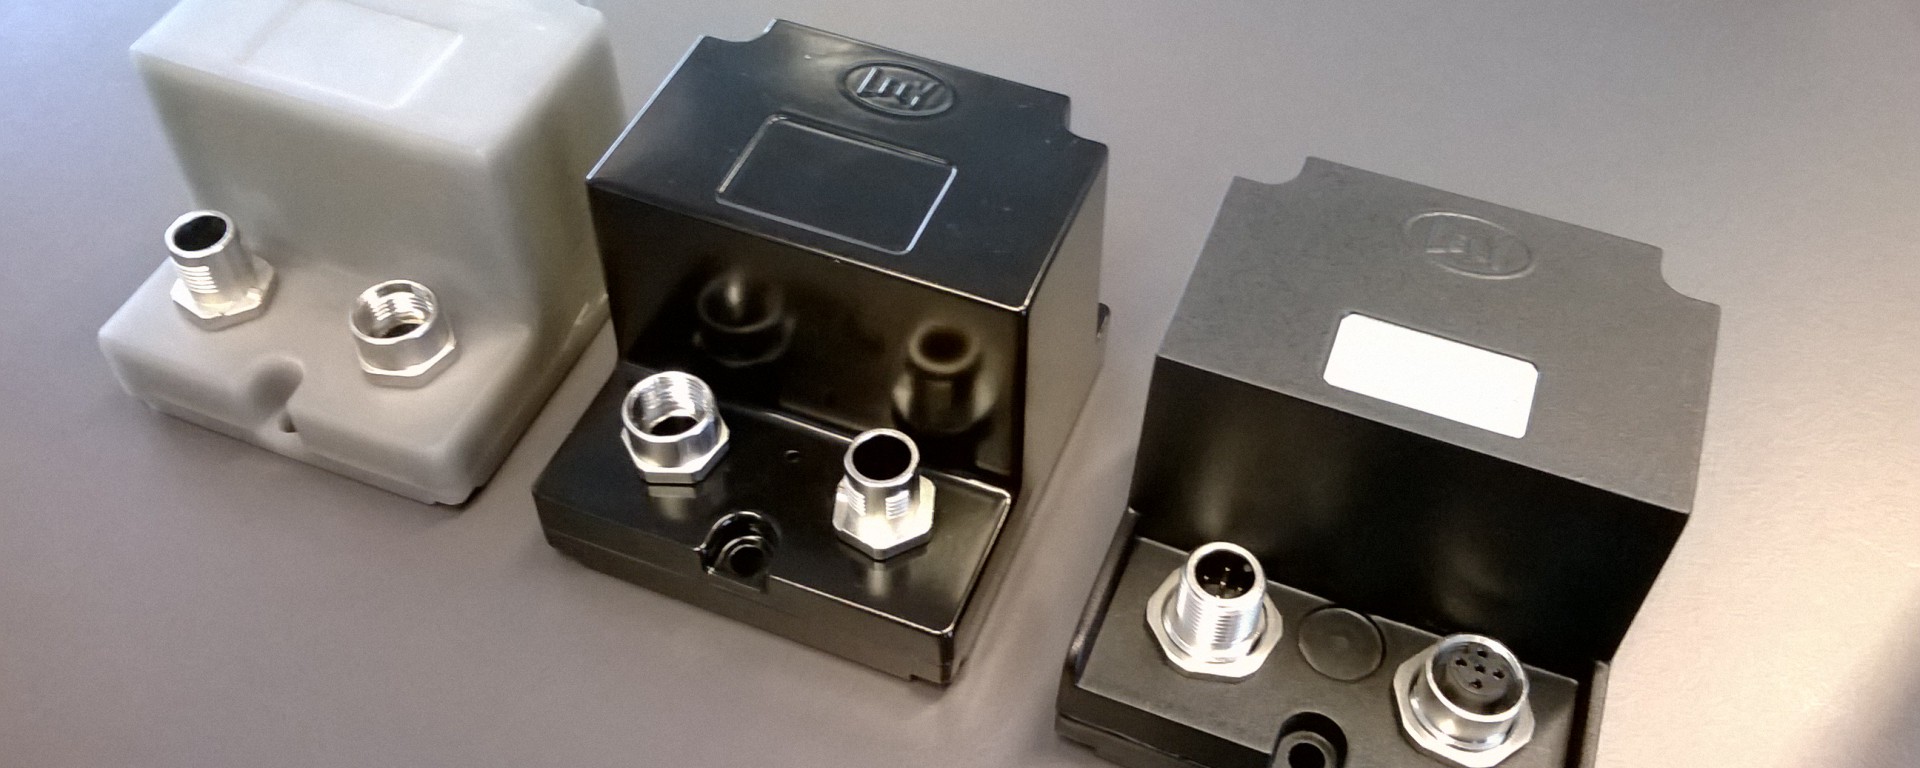
Rapid prototyping processes were used to be able to functionally test the design proposals. The first image below shows the evolution of the prototypes: The light grey version was the first prototype made by a Stereo lithograph 3D printer. The middle iterations was made with a vacuum casting process, which made it possible to make a larger series to field test. The one on the right is the finished product, the first out of tool injection moulded housing complete with PCB, seal and connectors.